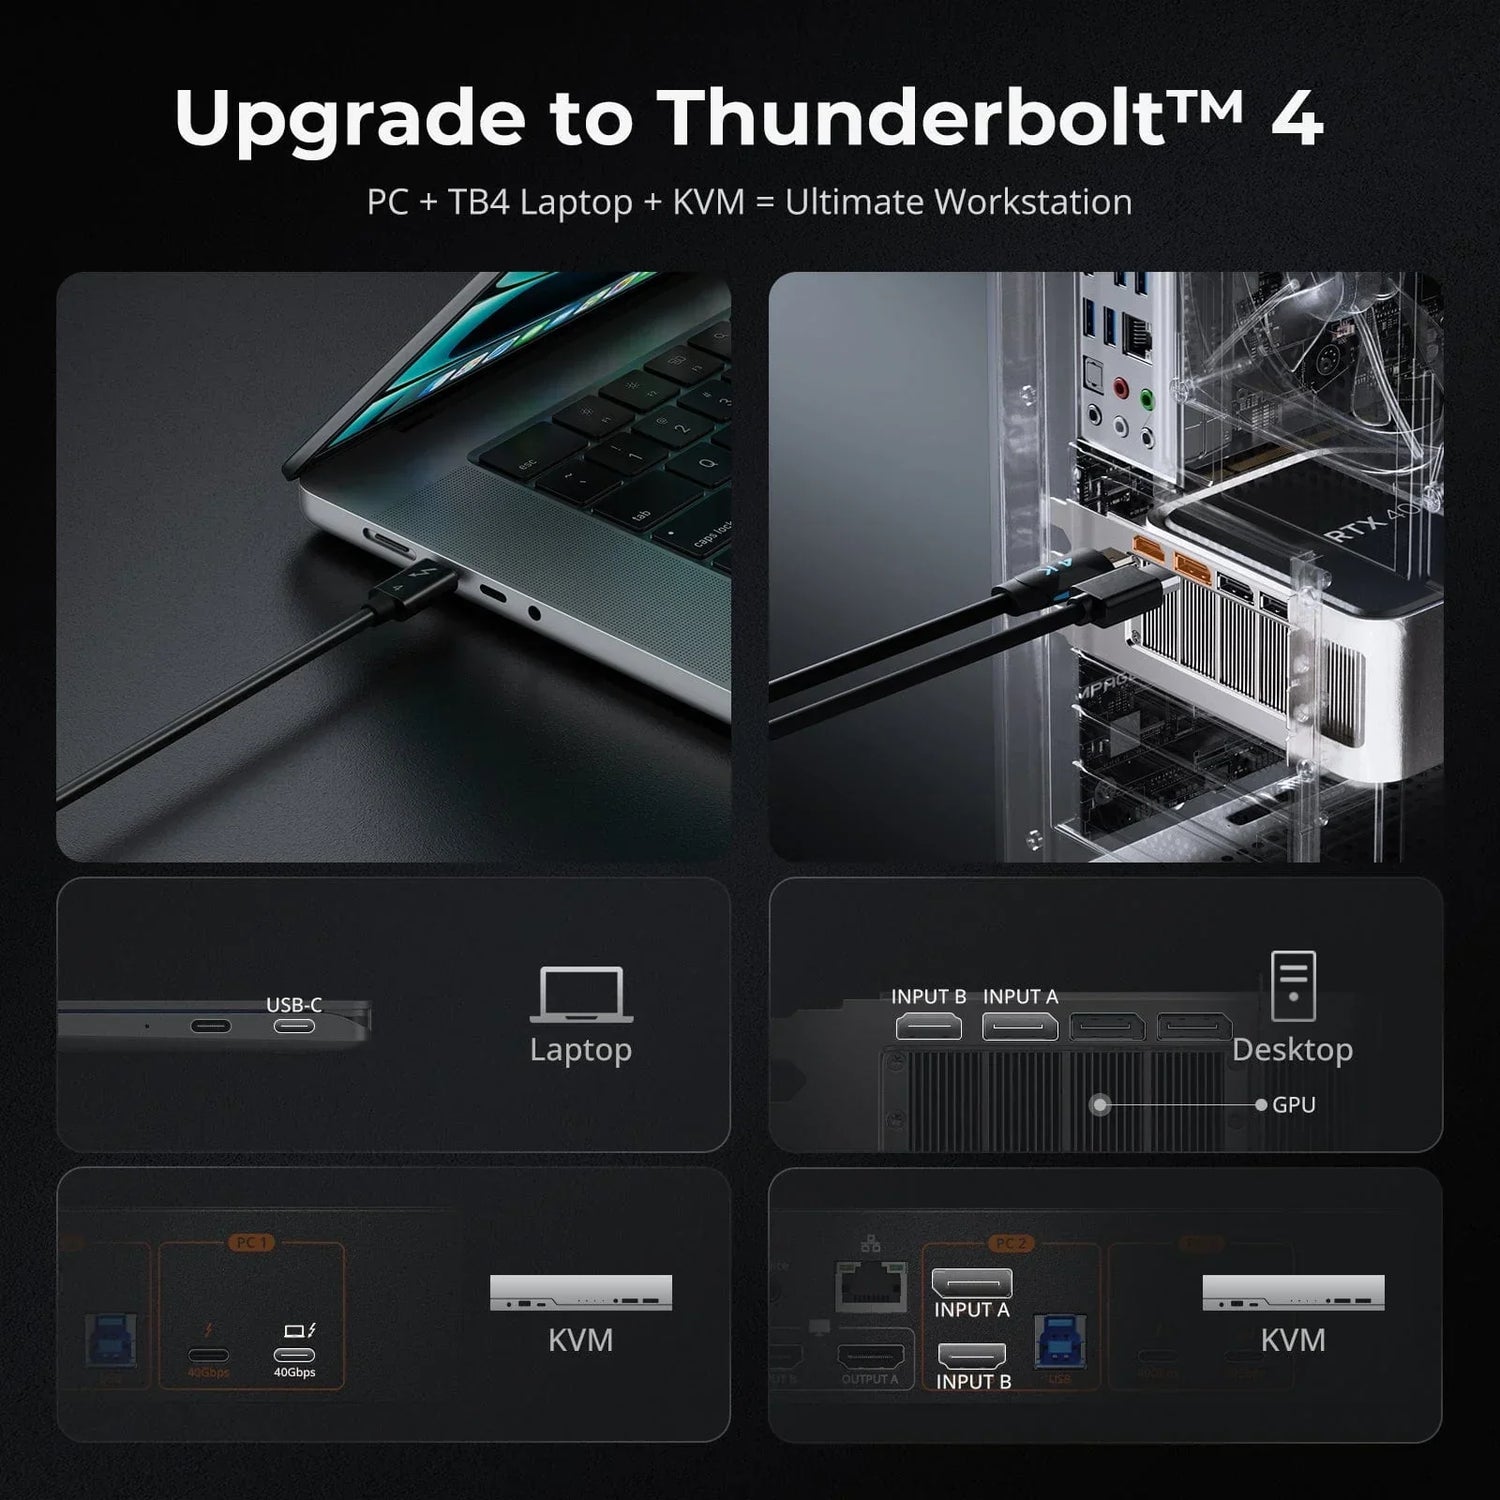
More people are finding it handy to use both a laptop and a desktop for work and entertainment. IT programmers, graphic designers, and gamers all benefit from its ability to streamline workflow and seamlessly switch between devices, enhancing productivity and multitasking efficiency.
When it comes to setting up these devices, using a KVM (keyboard, video, mouse) switch becomes essential. A KVM switch helps you manage multiple computers with just one set of peripherals. It makes switching between them effortless, saving you from the hassle of constantly plugging and unplugging cables.
Now, I'll be guiding you through the simple process of setting up a KVM switch using our HDC202-P23 Dual KVM Docking Station, which is especially made for connecting your laptop and computer. Whether you're a seasoned tech enthusiast or a beginner, you'll find this process straightforward and hassle-free.
Connection Preparations
- Confirm the ports (HDMI, DP, USB-A, USB-C) available on your laptop, desktop and monitors.
- Check if the KVM switch ports (2 USB-C ports for laptop, 1 DP port + 1 HDMI port + 1 USB-A port for PC, 2 HDMI ports for monitors) are compatible with your devices.
- Prepare the cables, adapters, and hubs if the connector types of them are incompatible.

Connection Steps
1. Connect your laptop to the KVM switch
A. If your Type-C laptop is running Windows OS
Connect the laptop to the Input port marked ‘A' of the KVM with a USB-C cable to enable MST mode. Connect 2 USB-C cables to the inputs ‘A'&‘B' or only the input ports marked ‘B' to disable the MST mode.
B. If your Type-C laptops are running MacOS
Connect your laptop to the Input ‘A'&‘B' ports of the KVM with 2 USB-C cables

2. Connect PC 2 with 1 DP cable and 1 HDMI cable

3. Connect an external mouse and keyboard to KVM's keyboard and mouse input ports

4. Connect USB 3.0 devices to KVM's standard USB 3.0 ports

5. Connect KVM's HDMI output ports to 2 HDMI monitors with 2 HDMI cables

6. Use the network cable to connect the LAN port on the KVM switch to a router or local area network switch

7. Connect an external audio device to KVM's audio port
8. Connect the power cable to KVM's DC 20V port and plug it to a power socket

By now, the connection has been completed. Turn on the power supply, and the KVM switch will begin to work. Here’s an example of what the whole setup will look like.

Setup Video for A Laptop and A Desktop with Dual Monitors
The HDC202-P23 offers seamless hybrid workstation integration with support for high-resolution visuals. Experience clarity with up to 4K@60Hz 4:4:4 resolution, ensuring sharp image quality for editing high-resolution content or engaging in competitive gaming. With additional support for high refresh rates, it caters to diverse user needs. Say goodbye to cluttered cables and hello to effortless productivity and convenience with the HDC202-P23.
Conclusion
Setting up a KVM switch for dual monitors with both a laptop and a desktop is a straightforward and empowering experience. Now that I've guided you through the entire setup process, it's time for you to dive in and try it yourself. The setup process for all other KVM switches follows a similar pattern, making it easy to adapt these instructions to any compatible device you may have. So, grab your device, follow the steps outlined, and unlock a new level of efficiency and productivity in your workspace. Happy switching!


