As remote work becomes more common, having an efficient home office setup is essential. To make the most of your workspace, you can connect two monitors to both a work laptop (MacBook) and a desktop computer (for gaming and personal use) using a KVM switch. This allows you to easily switch between devices without the hassle of reconnecting cables. Here’s how you can set this up.
Equipment List for Setting up the KVM Switch
- MacBook (for work)
- Desktop Computer (for gaming/personal use)
- Two Monitors (with HDMI or DisplayPort inputs)
- KVM Switch (supporting dual monitors)
- Cables (HDMI, DisplayPort, USB-C to HDMI/DisplayPort adapters if needed)
- Keyboard and Mouse (USB or wireless with a single receiver)
Dual Monitor Setup Challenge for MacBooks
When looking at the challenges of setting up dual monitors on MacBooks, it's crucial to consider the hardware aspect, particularly MST (Multi-Stream Transport). Apple silicon chips like the M1 and M2 series support MST (Multi-Stream Transport) hardware-wise, but macOS doesn't allow multiple displays through a single port. In contrast, Intel-based Macs with Thunderbolt 2 or Thunderbolt 3 (USB-C) ports support MST (Multi-Stream Transport), enabling multiple monitors via compatible hubs or daisy-chaining. This is due to macOS software limitations rather than hardware constraints.
*To learn more about Multi-Stream Transport (MST) , you may be interested in our blog What is DisplayPort MST (Multi-Stream Transport)?
Solution to the Dual Monitor Setup Challenge Faced by MacBooks
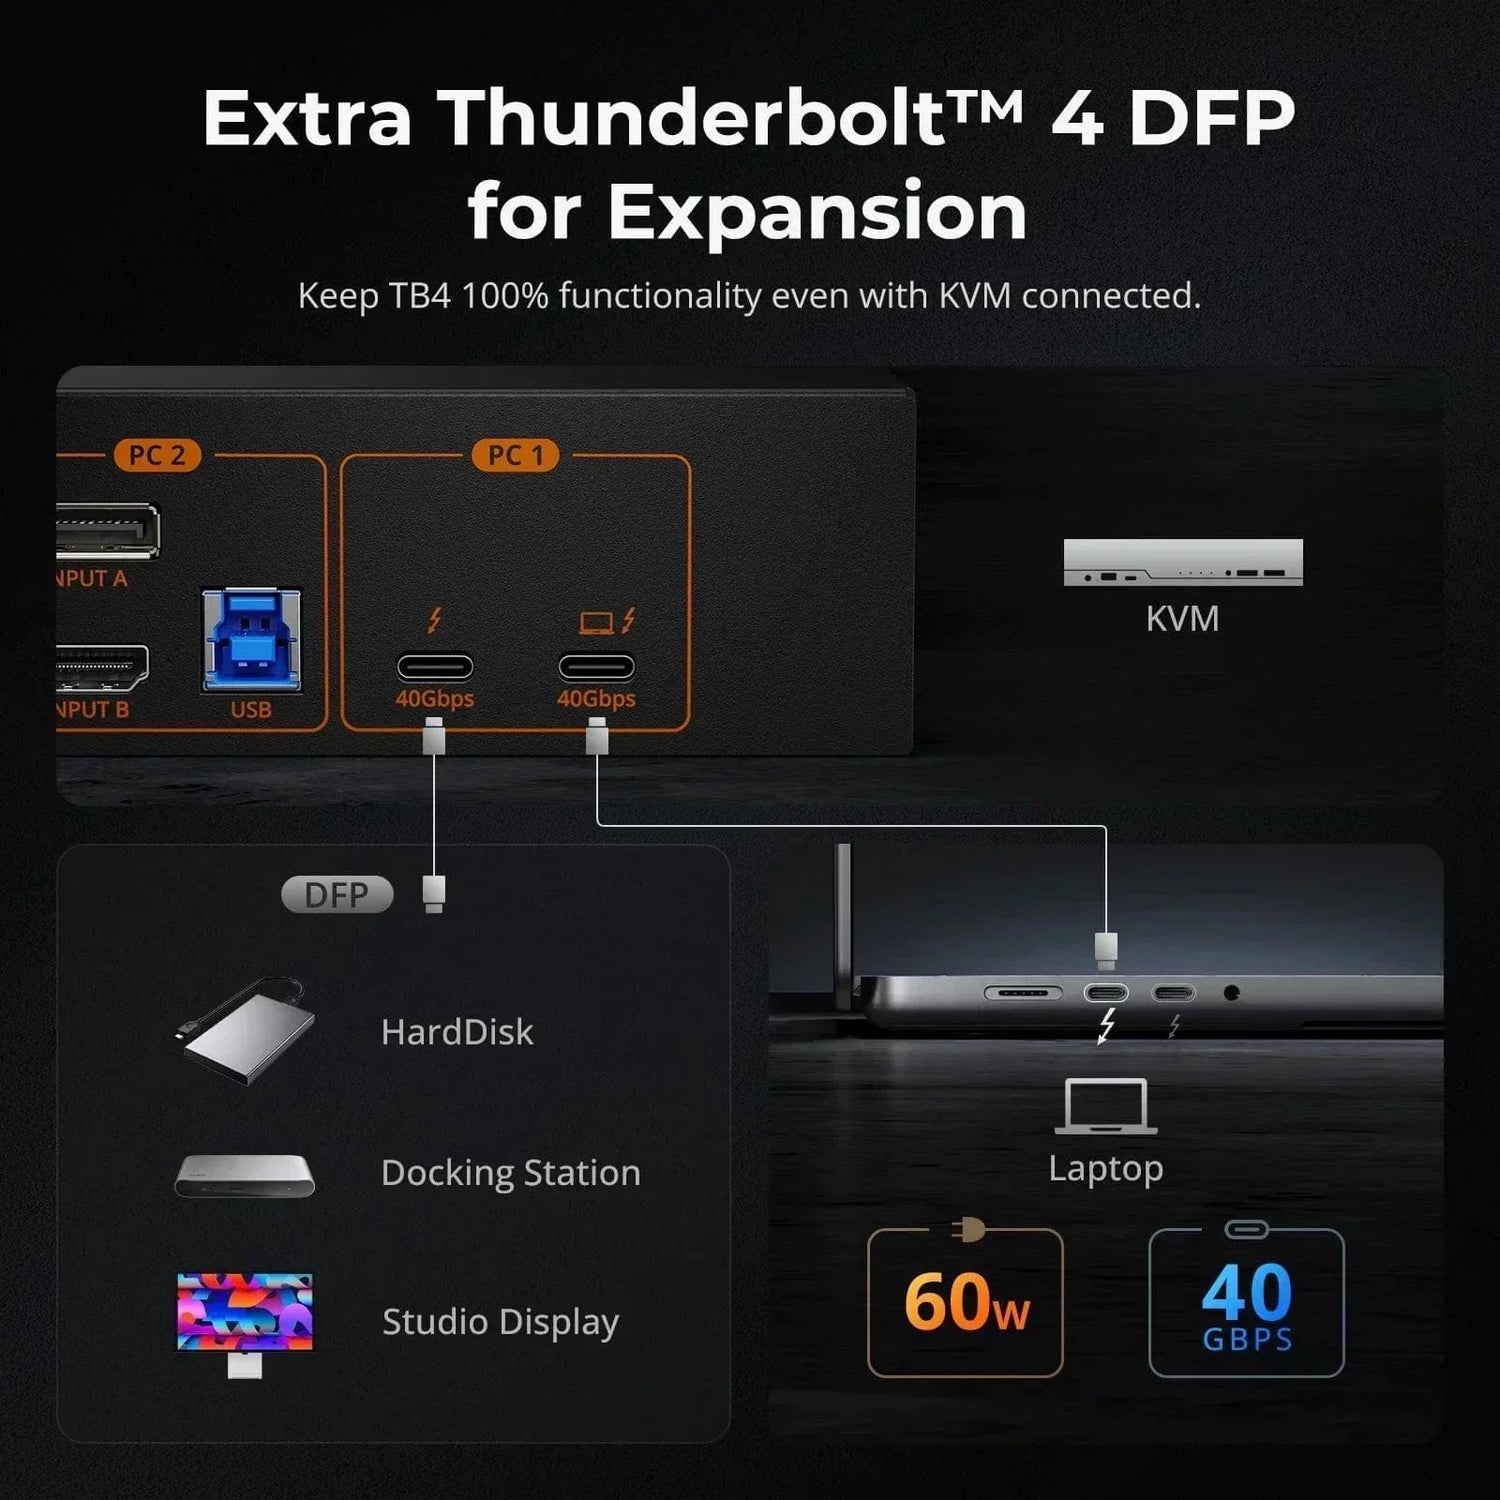
The traditional dual monitor KVM switch needs to connect two cables to each input device for the normal use of the dual monitor function. But our 2x2 Hybrid KVM Switch HDC202-P23 supports MST (Multi-Stream Transport) mode, allowing dual HDMI displays from a single USB-C source. This device is not just a switch, but a comprehensive 9-in-1 docking station that transforms your workspace.
Even though macOS doesn't support MST (Multi-Stream Transport), the HDC202-P23 is specifically designed with two USB-C ports to accommodate dual external monitors. With this setup, you can seamlessly control both a laptop and a desktop, switching between dual external monitors with a single set of peripherals. This streamlines your home office setup without the need for additional hardware, despite the MST limitation on MacBooks.
Other Key Features of HDC202-P23
Versatile Connectivity
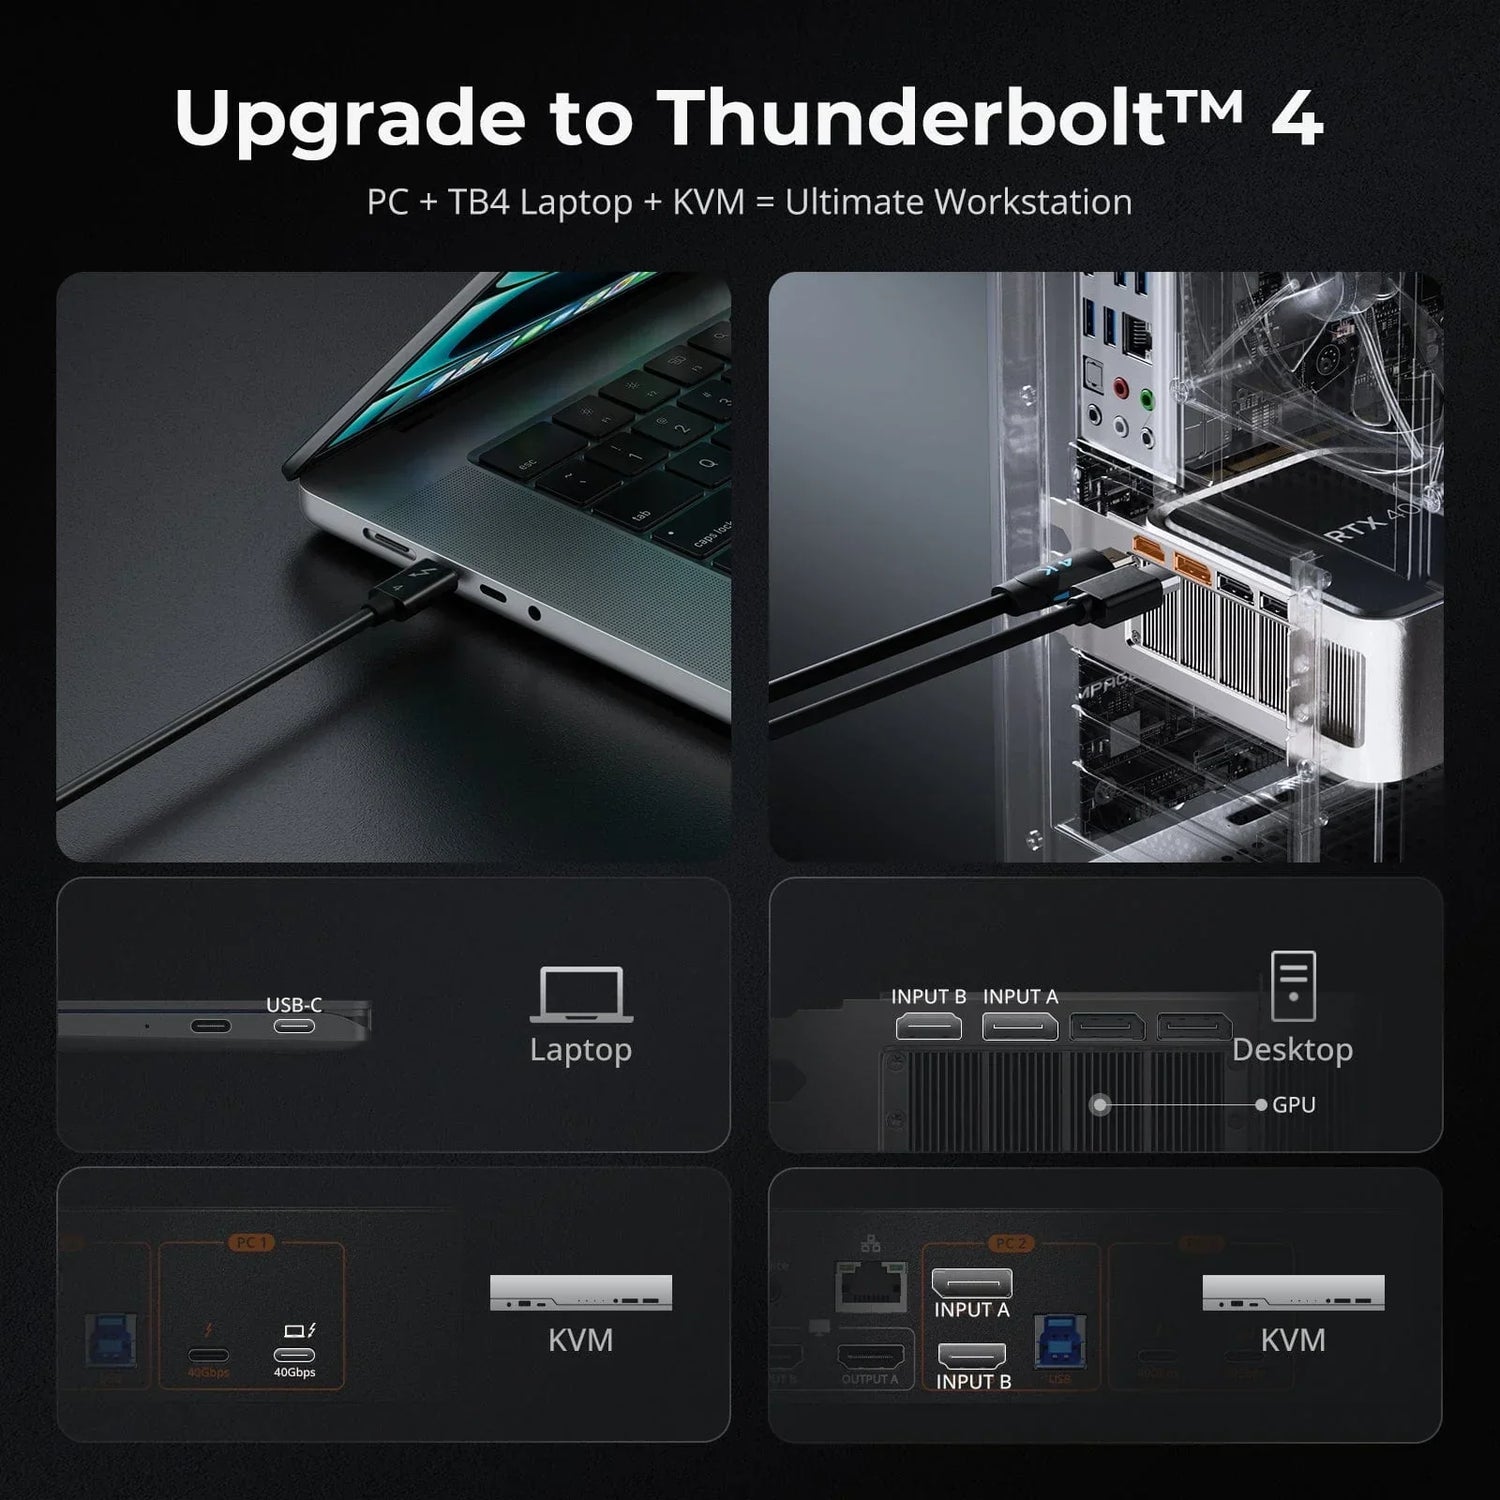
- HDMI+DP port combination for most graphics cards.
- Two USB-C ports support laptops with or without MST.
- Built-in power module for charging laptops.
- Built-in 1000 Mbps LAN port for internet access.
- Additional ports include USB 3.0, LAN, and headphone/microphone jack.
High-Resolution & High Refresh Rate
- Supports up to 4K@60Hz 4:4:4 resolution for high-quality visuals.
- High refresh rates supported: 1080P@240Hz/1080P@165Hz/1080P@144Hz/1080P@120Hz/2560×1440@120Hz
Advanced Features for a Streamlined Setup
- Effortlessly switch inputs using hotkeys, front panel button, or remote control.
- EDID emulation prevents resolution and icon rearrangement.
- K&M pass-through ensures compatibility with various keyboards, including wired, wireless, mechanical, and gaming keyboards.
*For more information about HDC202-P23, you may be interested in Introducing the HDC202-P23: A Revolutionary KVM Switch by TESmart.
How to Share Dual Monitors with a Macbook and a Desktop?
- Connect MacBook to KVM Switch
Connect your MacBook to the input ports of the KVM for the MacBoock with 2 USB-C cables.
Connect your desktop PC to the input ports of the KVM for the desktop PC with 1 USB-B to USB-C cable, 1 DP cable and 1 HDMI cable.
- Connect Dual Monitors to KVM Switch
Connect the primary monitor to the first HDMI output port on the KVM switch.
Connect the secondary monitor to the second HDMI output port on the KVM switch.
- Connect External Mouse and Keyboard
Plug your keyboard and mouse into the USB ports on the KVM switch. If using a wireless keyboard and mouse with a single USB receiver, plug the receiver into the KVM switch.
- Power On and Test
Use the KVM switch to toggle between the MacBook and the desktop, ensuring both monitors display correctly for each device. Adjust display settings on your MacBook and desktop to ensure the monitors are configured correctly (e.g., extended display vs. duplicate display).
*If the KVM switch has additional ports, including USB 3.0, LAN (for connection to a router or local area network switch), and headphone/microphone jack, you can plug in the devices accordingly for your specific use.
By following these steps, you should be able to seamlessly switch between your MacBook and desktop using dual monitors.
Unboxing and Demonstration of HDC202-P23
Conclusion
Setting up dual monitors with a MacBook and a desktop using a KVM switch offers a practical solution for home office setups. Despite macOS's limitations with MST (Multi-Stream Transport), innovative devices like the HDC202-P23 Hybrid KVM Switch provide a comprehensive solution.
If you're considering a KVM switch but need a solution that caters to different devices or setups, TESmart provides a wide range of KVM switches tailored to meet various needs. Explore our selection to discover the perfect match for your specific requirements. Whether it's for a home office, gaming setup, or professional workstation, we have the right solution to streamline your setup and enhance your workflow.