As live streaming becomes common, gamers increasingly adopt multiple computers and monitors to share their intensive gaming moments while profiting from this career. To ensure optimal performance during gameplay without interruptions, it's essential to separate gaming and streaming tasks. This often requires multiple devices, including dedicated gaming PC, streaming PC,, monitors, and various peripherals.
An efficient and streamlined setup is crucial not only for performance but also for decluttering the cables associated with these devices. By organizing the workspace, gamers can focus on their content without distractions. In this article, we’ll outline a common setup for game streaming and explain how a KVM switch can help gamers create an ideal streaming environment, making it easier to manage multiple devices seamlessly.
The Common Game Streaming Setup
Normally game streamers have all kinds of devices ranging from computer hardware to lighting equipment.
- Gaming PC(for high-performance gaming)
For a 1080p gaming setup, consider an Intel Core i5 or AMD Ryzen 5 paired with an NVIDIA GeForce 3050 or higher GPU. For 1440p, opt for an Intel Core i7 or AMD Ryzen 7 alongside a 3060 or better. For 4K gaming, aim for an Intel Core i9 or AMD Ryzen 9 combined with a 4070 or higher graphics card to ensure optimal performance. It’s recommended to have at least 16GB of RAM for smooth performance, though 32GB is ideal for intensive gaming and multitasking.
- Streaming PC (for broadcasting and managing overlays)
The Streaming PC doesn't require the same high specifications as the Gaming PC, as it focuses on broadcasting rather than intensive gaming performance. This allows for a less powerful processor, a mid-range GPU, and 16GB of RAM, all of which are sufficient for effective streaming without the need for the higher-end components found in a Gaming PC.
- Two External Monitors (one is 60Hz and the other is 114Hz or higher)
The higher-res one is for gaming and the lower one is for monitoring live streaming software (most streamers go with OBS).
- Professional Camera/High-Res Webcam
You can use Elgato Stream Link to connect the camera to your gaming PC (or just connect the High-Res Webcam to it), delivering high-quality video feeds, and a capture card to capture gameplay from your gaming PC and sends it to your streaming for broadcasting.
- Gaming Keyboard and Mouse
Gamers often tend to use mechanical/gaming keyboards and mouses, and Logitech is a quite famous brand they usually go with. Some sometimes will equip one set of Joystick for enhancing control.
- Streaming Peripherals
Other peripherals like Mic and headsets are indispensable as well, as they enhance communication and audio quality during streams.
While the essentials for game streaming include powerful PCs, dual monitors, and high-quality peripherals, additional devices like an Ethernet box (for Internet connection of the PCs) and an Elgato Stream Deck (for hiding/showing face cam or switching scenes on OBS while streaming) are also important. However, with so many components, your desk can quickly become cluttered. This is where a KVM switch can help, enabling you to manage multiple computers with a single set of peripherals, streamlining your setup and keeping your workspace tidy.
The Role of KVM Switches
In a setup with two computers and two monitors, the gaming PC's output is captured via a capture card and displayed on the streaming PC. The streamer can monitor the game on one screen while using the second monitor to manage streaming tasks.
Integrating a KVM switch into this configuration can enhance the streaming experience. The KVM switch would primarily facilitate switching control between the two PCs using the same keyboard and mouse. Most, if not all, of the mentioned devices can be integrated and connected to the KVM switch, reducing desk clutter and minimizing cable management issues. This streamlined setup not only enhances functionality but also contributes to a cleaner workspace, allowing the streamer to focus on the content rather than the equipment.
Imagine the streamer is live on Twitch, playing an intense match on his gaming PC. With a simple button press on the KVM switch, he can easily switch control between his gaming PC (connected to screen 1) and his streaming PC (connected to screen 2) using the same keyboard and mouse.
This allows him to view and interact with the streaming PC—responding to fan messages or managing giveaways—without needing to physically change his setup or use different peripherals. Once he’s done interacting, he can simply switch back to the gaming PC and continue your game seamlessly.
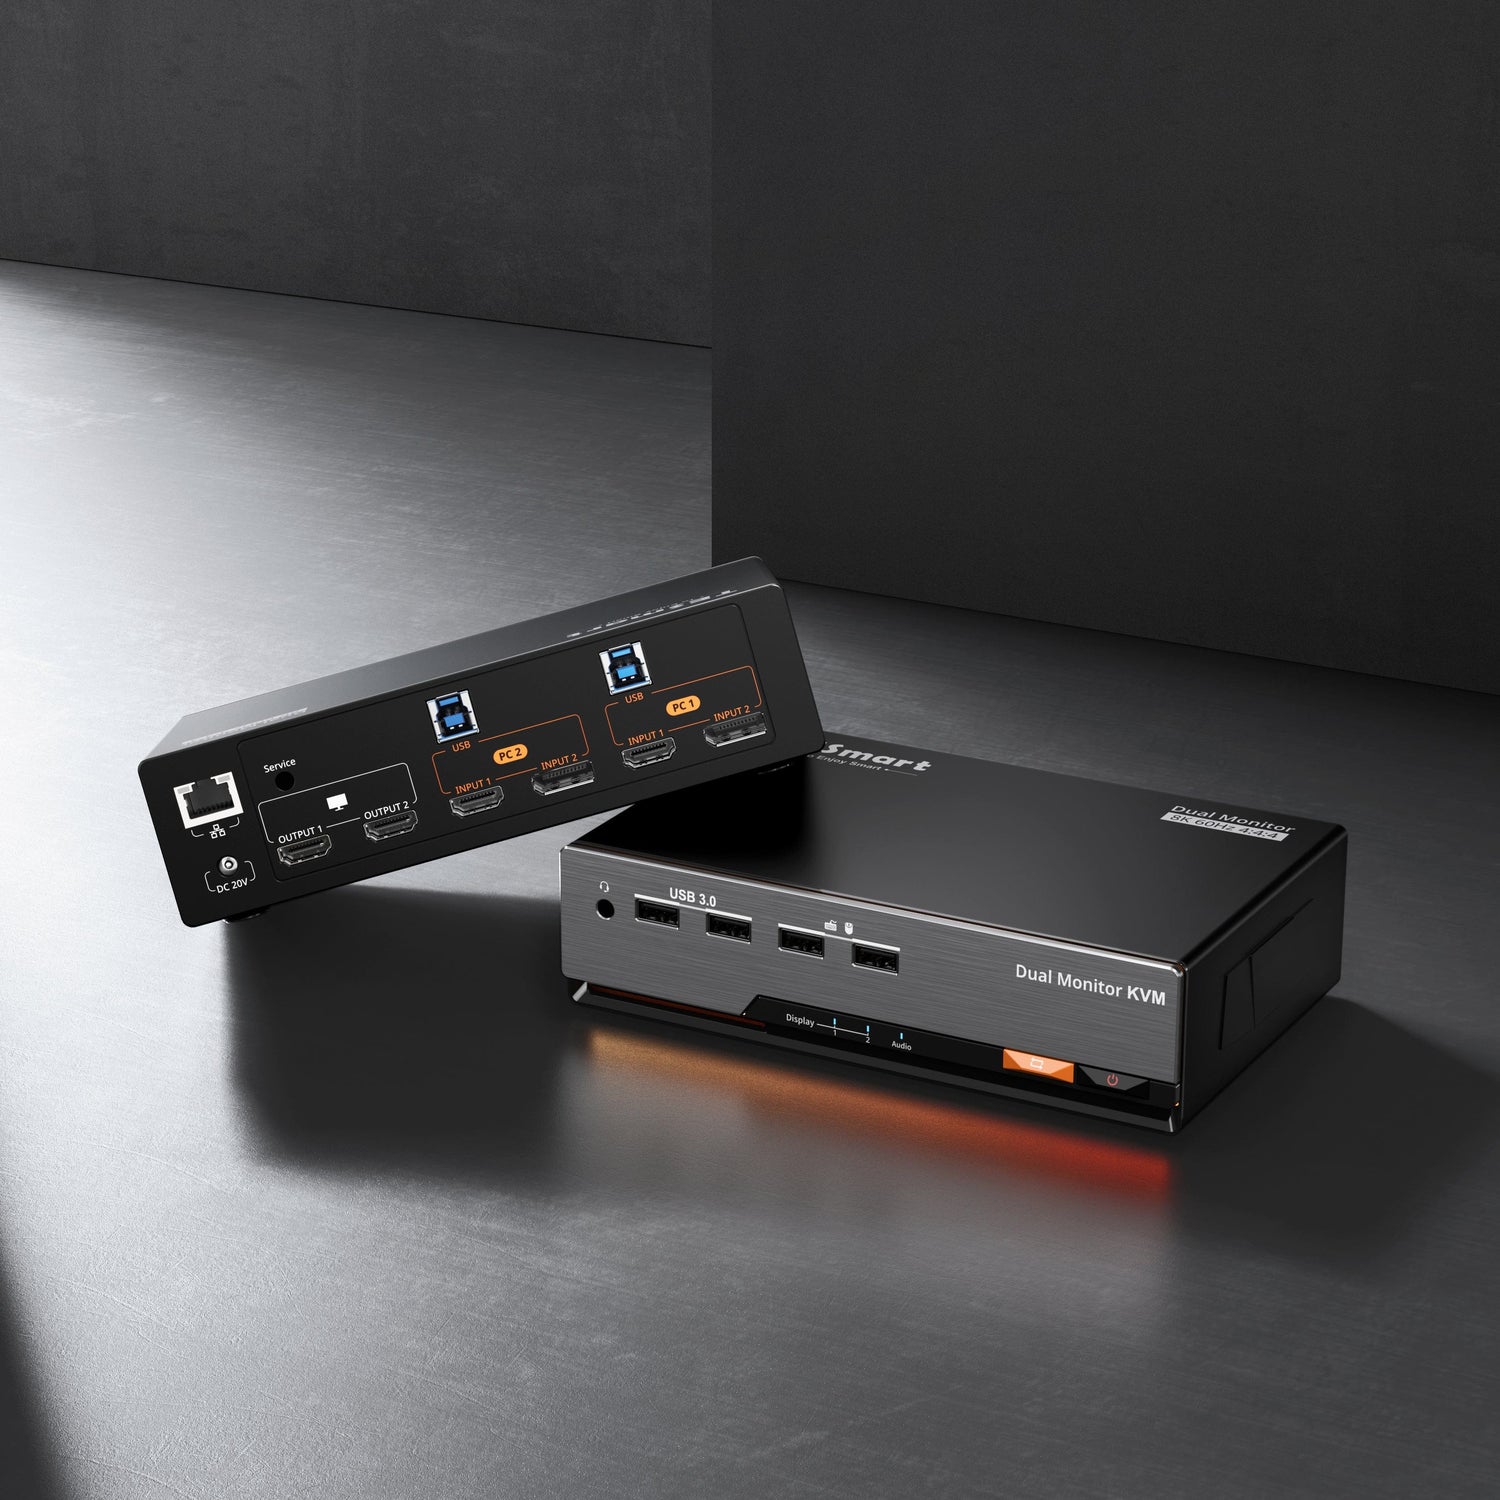
Here comes a perfect TESmart KVM switch for elevating your game streaming experience —— DP 1.4 Dual 8K@60Hz KVM Switch Gaming Dock for 2 PCs 2 Monitors DKS202-M24.
How DKS202-M24 KVM Switch Elevates Game Streaming
First of all, you would definitely need the KVM switch to support your intensive gameplay and video feed editing. Right on the spot that DKS202-M24 supports dual 8K/4K editing and dual 4K@144Hz/165Hz gaming. It’s also compatible with Nvidia and AMD graphics cards (with G-Sync and FreeSync ) in your gaming PC, ensuring stable, tear-free, and ghost-free gaming visuals.
Long a leader in EDID emulation, DKS202-M24 will ensure the windows and icons stay exactly the same positions after you switch PCs, ridding your worries about resolution and icon rearrangement.
For your mechanical/gaming keyboards and mouses, DKS202-M24 features K&M pass-through and legacy emulation mode for wide keyboard compatibility: wired, wireless, mechanical, and gaming keyboards. It also shares USB 3.0 and audio peripherals for added convenience.
With this KVM switch, you no longer need an Ethernet box either as it supports 1000mps LAN port for both of your PCs, which solves the problem of cable cluttering in some part.
After introducing all the gameplay-related features, there are many more advantages of the KVM switch DKS202-M24 to discover, such as the RGB LED strip that enhances your streaming lighting effects. For more details, please check our product page.


How to Integrate All the Streaming Devices to KVM Switch DKS202-M24

Integrating all your streaming devices with TESmart’s KVM switch DKS202-M24 can create a more efficient and organized gaming and streaming setup. Here’s how to do it effectively:
- Connect Your PCs
Use the provided DisplayPort cables to connect your Gaming PC and Streaming PC to the KVM switch. Make sure to connect your gaming PC to one input and your streaming PC to the other.
- Attach Monitors
Connect your monitors to the KVM switch using the DisplayPort outputs. The DKS202-M24 supports dual monitors, allowing you to connect two displays for either PC.
- Connect K&M
Plug your mechanical keyboard and gaming mouse into the USB ports on the KVM switch. This allows you to control both PCs using the same peripherals.
- Streaming Devices
Use an Elgato Cam Link (HDMI-to-USB cable) to connect the camera to the KVM switch’s USB 3.0 port. Plug the capture card into the streaming PC via USB to facilitate gameplay capture.
- Microphone and Headset
Connect your microphone and headset to the KVM switch for audio input/output during streams.
- Add Additional Equipment
Connect the Stream Deck to one of the USB 3.0 ports on the KVM switch for easy scene switching and control during your stream.
Conclusion
By integrating all your streaming devices with the TESmart DKS202-M24 KVM switch, you create a more manageable and streamlined environment that enhances your gaming and streaming experience. This setup minimizes clutter, simplifies control, and allows for a more focused approach to content creation.